Tuesday 18 December 2012

NP - Seberang Jaya Industrial Park

Exposure: Aperture F8|Shutter Speed 15s|ISO 200
Back to action at night after flu recovery, I feel really great again to see the night light.

Technical wise, ambient light for background with my car headlight illuminating the foreground to lead the eyes from left to right.

Thursday 22 November 2012

NP: KK Bay Area Romance


Re-processing of my old images, this is located at my beautiful home town Kuala Kurau, like the ambient there, with the wind whispering and raining stars ...

Technical wise, this is stacked using a set of 20 minutes images using Starstax and further processed with layer masking in Photoshop for foreground subject. There are gaps in the star trails as I didn't know how to use intervalometer in D7000 and pressing the shutter manually at that time(I could have used Startrails.exe for better gap filling of star trails but sometimes it's better to remember our mistakes as learning experience)

MNS - Night Portrait

Exposure: Aperture F11|Shutter Speed 15s|ISO 100
Night portrait is way harder than I thought, finding a good background, to place the subject comfortably so they can hold still for long period of time and yet not having that stiff look, and run around to pop the strobe here and there, anyway it's tiresome but fun process.

Technical wise, this is not HDR though it looks like it, for the lighting technique, existing fluorescent light on camera left, then one pop of 1/16 power strobe from the front of the subject at camera right and 3 pops of 1/2 power strobe from the back of the subject at camera right. The post process is straight forward, just unsharp mask and minor contrast adjustment.

Thursday 1 November 2012

MNS - Flawless Moment

Exposure: Aperture F11|Shutter Speed 15s|ISO 400|WB Fluorescent
Technical wise, I seem to use fluorescent white balance more especially with sodium vapor lit night scene, this WB setting retains both red and blue channel very well(not extreme to one channel so we can have the best of both worlds)

The flawless sky is made by the old lady who walked through my lens view, she had white fabric wrapped on her head loosely and that created smooth cloud colour and shape in the sky.

Friday 26 October 2012

MNS - Inya Lake Moonset

Exposure: Aperture F8|Shutter Speed 20s|ISO 200
The moon set within the two trees in Inya Lake, Yangon, creating the romance mood for the scene since this location is popular for lovers at night.

Tuesday 23 October 2012

National Geography: Crypts & Catacombs

National Geography always shows off the amazing stuffs and this set of images really catch my eyes and heart, it generates the sacred and unexplained feeling though, you can find the set of images here -

http://travel.nationalgeographic.com/travel/countries/crypt-photos

There are more to explore in the world we live in, whether known or unknown ...

Monday 15 October 2012

MNS - Split Tone

Exposure: Aperture F8|Shutter Speed 15s|ISO 200
It's Playing Time, light painting is always fun to do, I use the blue color light(cold) to split the foreground subject from the background which is illuminated by the street light(warm).

Awesome, I have plastic bag in the foreground "again", I wonder how many times I have to do housekeeping when shooting at night. Of course I can clone it out during post-processing but it's always better to have clean image taken whenever possible.

MNS: Night Romance

Exposure: Aperture F8|Shutter Speed 4s|ISO 100|WB 5500k

Friday 12 October 2012

Nikon D7000 Intervalometer

The built-in intervalometer of D7000 can be very useful when comes to creating star trails or timelapse, however even myself is confused and frustrated by the setting there, so to clear it out and remind myself in case I may forget next time, I better note it down here to share with people who needs clear instruction on how to use it correctly.

The steps to use intervalometer -

Shooting Menu -> Interval Timer Shooting -> Start time(Basically select Now) -> Interval -> Select intervals X no. of shots -> Start(Basically select On and press ok button if you want to start now)

The confusing part is actually these particular options, most people tend to think that Interval as interval duration between each shot and in fact it is wrong.

Interval = Shutter Speed + Interval Between Shot
Select intervals X no. of Shots = Number Of Interval x Number of shot

To configure the setting, you first need to know your shutter speed, say your shutter speed is 10 seconds, and you want 5 seconds interval between each shot, you need to set 15 seconds in Interval.

For shooting total 50 frames, what you need to do is set Select intervals to 50 and no. of shots to 1 so it becomes 50 x 1 = Total 50 frames.

Basically this means that it will run 50 times of 15 seconds interval so you get the idea of total time too.

Unless my shutter speed needs to go over 30 seconds since that's the max for D7000, otherwise there's no point for me to use external remote device for the job. Cheers ;)

Tuesday 9 October 2012

NP - Burning Legion

Exposure: Aperture F5.6|Shutter Speed 30s|ISO 250
Illuminated by the strong sodium vapor(street light), fluorescent white balance is used to retain blue sky while keeping the orange color, post-process to saturate the orange color to give the sense of burning.

This area is found at Selama, Perak, it was under ruthless fire few years back, today the only remained is the skeleton of the buildings. There's no sign of reconstruction, the ferns are growing happily in the building. As the location is at the main road of the town and you can never tell when it will be rebuilt. 

Monday 8 October 2012

MNS - Rain With The Moon


The image stacking is done on 30 minutes set of images and each single image exposure: Aperture F8|Shutter Speed 10s|ISO 800|WB Tungsten, with ISO 800 I have to use shorter shutter speed to avoid blown highlight while able to capture the stars in not so light polluted area, would like to open up aperture but the street light is blowing me back to F8, also proof again white subject is not easy to shot with changing light that can be easily reflected by the white surface.

The stars have big brother here, rain with the moon ;)

Saturday 29 September 2012

MNS - The Abandoned Industry One

Exposure: Aperture F8|Shutter Speed 30s|ISO 400

Technical wise, straw color gel light from bottom to cast the shadow of the wall, with 8000k white balance setting. By illuminating the wall from low angle, it creates the diagonal shadow, and to create the ghosting leafs effect, just illuminate the leaf couple of times with the torch at different time intervals will do.

Ghosting leafs, diagonal shadow, wall of decay and moonless, what other elements than these to make a horror night?

Friday 7 September 2012

Tuesday 21 August 2012

Night Portrait

Exposure: Aperture F8|Shutter Speed 30s|ISO 100
For the fun of it ;)

Thought process: It's about having fun when shooting people at night, this is not done outdoor but indoor, I just use strobe and punch the light from left and right, setting at 1/2 power. The reason is to bring out the texture and the shape of both people and background, having him seated like a psycho, the real challenge is my friend needs to sit still for 30 seconds and he is like a rock during exposure time.

Tuesday 7 August 2012

MNS: China Town Surrounding

Exposure: Aperture F11|Shutter Speed 25s|ISO 100
A lot of countries have China Town, so do Myanmar.

Thought Process: Looking up, generates the view of "importance", there are couple of buildings looking exactly like this one, I just like the architectural look of them. It is chopped at the bottom when I frame it because the road is quite busy and it generates too much attention if I include them, all I want is to show is this particular building at night, simple as that.

Friday 3 August 2012

NPY

The End Of Strife
StormCloud Alignment
Light & Shadow

Thursday 2 August 2012

MNS: Kandawgyi Wheel Bridge

Exposure: Aperture F8|Shutter Speed 0.4s|ISO 800
Walking around Kandawgyi Lake, you will always find interesting subjects to shoot, it is kind of bringing you back to old time where you can find a lot of hard light around the area with overlapping shadows.

Thought process: Very quick on this one, I captured the wheel bridge with handheld once I see it, visually it reminds me of Film Noir world. I'm always the fan, they always tell the story using the shape and contrast, their light sculpting techniques are yet to learn for me. 

Sunday 29 July 2012

Use what you have for creative process

Exposure: Aperture F14|Shutter Speed 1/125s|ISO 100
I like to shoot through some glasses, and use them as my creative filter as I have posted previously here.

Thought Process: The glass from my hotel room is like ND with magenta color filter, with that it cuts down the light and only allows magenta color cast(blue/red) through the glass and makes it easy for me to ignore other color spectrum, this generates interesting and surreal scene to me because you don't normally get a rounded sun in mid day when shooting it. There are tricks to shoot through the glass without getting any reflection, either switch off all the lights in your room or attach the lens to the glass ;)

There's not much post-processing except enhancing the contrast.

Monday 23 July 2012

MNS: Double Grey Moon Ring

Exposure: Aperture F8|Shutter Speed 10s|ISO 100
Moon surface is grey, and this image just tells exactly that ;)

Thought process: The moon ring is visible to the eyes, trying to capture it is another story as it requires certain exposure combination for certain cameras/lens, it's "trial and error" style this time. Composition wise, weird angle with satellite talking to the outer space, to balance it I include the red/green building block to the frame as well.

If you observe the image carefully, you might see second moon ring appeared at the top right corner of the frame, basically moon ring indicates the storm or bad weather coming, according on the wikipedia source.

Friday 20 July 2012

MNS: Light & Shadow

Exposure: Aperture F8|Shutter Speed 1/5s|ISO 400
Kandawgyi Lake is big, bigger than I expected. As there's no way to cover every single place, finding what I like to cover is important.

Thought process: When there's light, there's shadow! In photography we always learn to see the light, try the opposite to improve the way you see things around you, been practising it with or without my camera.

Saturday 2 June 2012

MNS: Infamous Shwedagon Pagoda

Exposure: Aperture F16|Shutter Speed 25s|ISO100

Shwedagon Pagoda is one of the most sacred Pagoda in Myanmar. More information can be found in the wikipedia regarding it. Most of the time I avoid tourist attraction when taking photos at night unless I can find new perspective to present it.

Thought process: Staying in Yangon City, you will certainly see the Shwedagon Pagoda, and I have been seeing many images of the Pagoda, be it in real life, in post cards or drawings. I keep looking for new perspective to create fresh image for Shwedagon Pagoda until I found the location shown in the image above.

The big red triangle gate is not the entrance to Shwedagon Pagoda, in fact it is the gate of decommissioned army base, Shwedagon Pagoda however is located at the other end, what attracted my eyes to create image like this is the shape of the gate and Shwedagon Pagoda(they both have triangle shape), when the gate and Pagoda aligned properly in the image, it does bring our eyes directly into the Shwedagon Pagoda even though it is very small in the image, then I control the exposure properly so that the golden glow on Shwedagon Pagoda doesn't overexpose until detail is gone.

About the light steak, it requires timing and luck, there are traffic lights nearby so basically I just made rough calculation on timing to get where I want the light steak to show in the image, it requires couple of tries because you may get caught into something in 25 seconds time.

Tuesday 1 May 2012

NPT: Auto-Focus At Night?

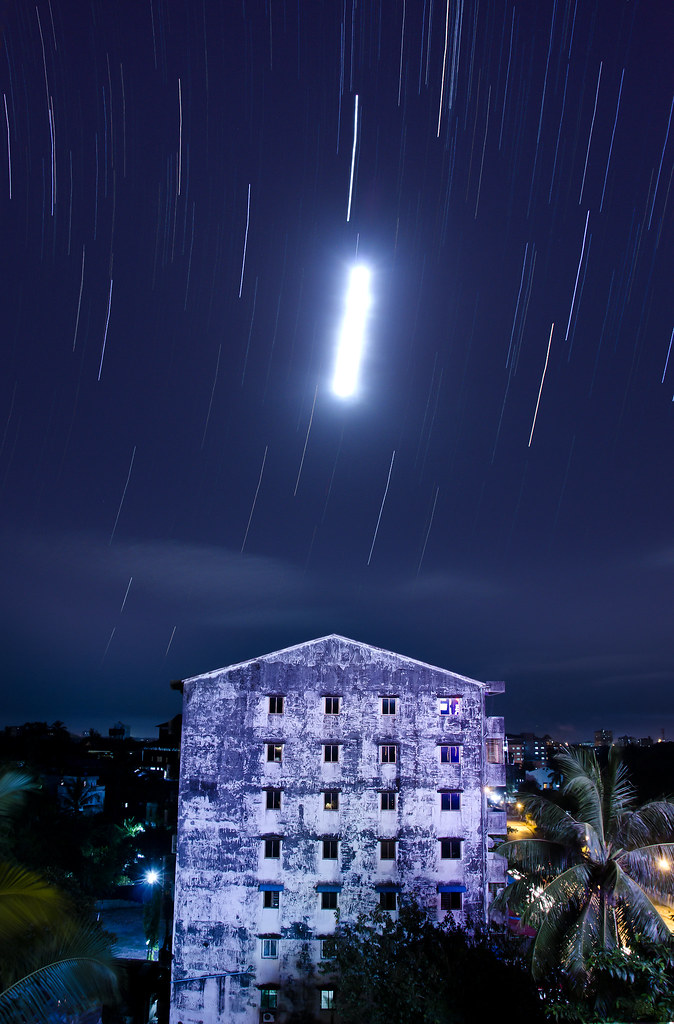
I would like to introduce new section for my blog, it's called Night Photography Trick(NPT).

One of the common challenge that must be encountered by most night photographers is to get subject in focus, shooting at low light condition is not simple as auto-focus won't work most of the time due to lack of contrast in the scene. Getting bright len may help a little but not much, seriously.

Manual focus and Hyperfocal distance are the best friends for night photographer. Night photographer usually relies on them to get subject in focus.

Two widely used techniques are -

1. To get manual focus working, night photographer will illuminate the subject temporarily with torch/flash light(just like using  modeling light), then tune the focus ring until subject in focus. Otherwise switch on auto-focus and get camera to focus quickly if there's enough contrast, then switch back to manual focus once the subject in focus. Using this technique has advantage because you don't have to re-focus again in case want to re-take.

2. Hyperfocal distance is way simpler to operate, just tune the focus ring to infinity, as long as you have your subject in effective focus range/field, you are all good.

The first technique has shortcoming, especially the subject you want to focus is quite far from the camera position and you can't throw enough light on them easily, and this technique is more practical when you have accompany(since you can't move away from your camera when focusing so getting someone to help is a must), second technique is good to get subject in focus, but it also brings greater depth of field and you can't get close distance subject in focus easily(need to do some calculation), you may want to avoid this technique as well when you are shooting below F5.6 aperture setting.

 I have experimented with new technique to get subject in focus at night, one of the problem I want to solve during focusing at night is to focus anywhere I want in the viewfinder, and to get subject in focus as quickly as possible. I normally out for shooting alone at night, and this technique works very well even if you don't have accompany.

The key to this technique is make use of laser pen(laser pointer), I get green laser pen because it works very well in low light condition, read the link here and you will get what I mean. With green laser pen, I can point to the main subject and get my camera auto-focus easily, once the main subject in focus I can quickly switch to manual focus mode to lock down the focus. It also allows me to work quickly when I just want to move my camera slightly for better composition, I can re-focus by pointing the laser to the subject again. Do you want to focus on mid-range subject, no longer you have hard time doing so. The only catch with using laser pen is you must be careful not to point to someone which may cause eye damage.

Grab a green laser pen, it's so small and portable, and experiment with the technique I'm sharing here, then tell me about your experience, the laser pen has become my best friend for the night out for a while now.

Thursday 26 April 2012

MNS: We Are Colourful

Exposure: Aperture F11|Shutter Speed 20s|ISO 100
In Myanmar, it's quite easy to see old-school car, I always think that old car has better design in term of outlook compares to new one, maybe it's just me. There are many hawker stalls painted with vivid colour can be found in Yangon, Myanmar as well. 

Thought process: Colourful car, colourful stalls, and extreme orangish background, there's fluorescent light on the camera right(45 degree). I really like the color contrast setting here, but I want to add some light so they have little bit of cartoon look; snooted blue light on the car head lights and generate specular green light to the bumper of the car to show its iron teeth.

Most of the time we will try to separate the foreground and background subject using low aperture number(below F8) to blur the background so they get less attention, but for this one, it's the RGB color!

Tuesday 24 April 2012

MNS: Painting The Rusty Beauty

Image 01. Exposure: Aperture F16|Shutter Speed 74.5s|ISO 100
Image 02. Exposure: Aperture F9|Shutter Speed 30s|ISO 100
For this post I will go straight to thought process since the location is introduced in previous post. This location basically opens up a lot of opportunities for night photographer to try out stuffs.

Thought process: There are times when I want to be playful with light so the image comes out interesting and dramatic, there are also times I want added light to look real.

When I want the subject to look real, I usually fill neutral/warm white colour(high colour rendering index(CRI)) light to the subject, especially to bring out shadow detail. If I want them to look surreal, I will blend different colour of light into the scene.

This time I want to add different colour of light while making them look real and believable as if no light has been added. I'm still experimenting and hope to improve over time. Two important keys here, one is looking at the ambient light around so that you can plan on how to blend your light into the scene, second is examine the surface and its colour you plan to paint the light on. For me I want to create the image that brings the feel of rustiness here.

Image 01. 75 seconds exposure, just enough time to paint the light, I painted two portions in the image, one on the camera right, I filled the shadow with red colour light, it plays well with the background because you can see few stripes of red colour light at the back wall which illuminated by the existing light. The second portion is actually done inside the car, where I actually ran into and illuminated the wind-shield with green colour light, why green light, apparently the wind-shield has growing moss and I want them to be seen.

Image 02. Only one green colour light is added at the open door of  the second truck which is just beside the main truck, I hid behind the main truck and illuminated the open door, I tried to narrow the light as much as possible to bring out the detail even though it looked subtle.

Post processing wise, no image stacking here, just tried out couple of times to get the result, and slight contrast adjustment in lightroom.

More experiment to come, stay tuned.

Monday 23 April 2012

MNS: Yangon Twins

Exposure: Aperture F9|Shutter Speed 30s|ISO 100
I have visited Myanmar couple of times, way before I started night photography journey. After gotten into night photography, I realize how much night needs attention than the day in order to photograph them.

In fact this should be posted first in my Myanmar Night Series(MNS) so I'm doing a flashback here.

First night discovery of Myanmar, Yangon, it was full moon night, I picked up my camera gears and took the taxi to China Town, after that walked alone without direction in mind but to discover what is around. It sounds adventurous because you don't plan it, and never know what you are going to encounter.

Everywhere is quite dark at night, because there are quite a distance between each street light or no street light at all. Walking in the dark is challenging especially in the location you are not familiar with.

Walking out of China Town into small village, where a lot of locals are living. I found that it is a gem for street photographer, really. Not only you can see but feel the living of people here.

Keep walking and suddenly, something hits me, not stick but the scene(as shown in the image above). I didn't rush into the location, just walked slowly to meet the people and asked permission to take photos. I felt grateful to get a "YES" from them(thank you Justin, one of the locals who can speak good English), but they were curious why I want to take photos at night. So the night is not alone, people who live here came out to see how I make the night photos, children were having fun by chasing each others and playing, it ended up becoming some sort of night activity for them as well. As this is the first time visit, and to respect their will since they usually sleep early, I finished my shooting at 11:15pm.

Thought process: For this image, what strikes me here are two identical trucks, and two identical houses, with the weird sky line which I have never seen before, it is so contrasty and surreal. There are two main light sources, the front street light, and full moon light, no light painting applied here, hopefully I able to capture the sense of place here. For a little bit of history, this location survives strong cyclone before, the houses around are in diagonal shape.

On the other hand, along with another 49 images, this image is selected to be showed in Night Light exhibition organized by Darkroom Gallery. I also plan to go back to the same location again, the people there become my friends now.

Sunday 22 April 2012

MNS: Kandawgyi Lake In Black & White

Image 01. Exposure: Aperture F8|Shutter Speed 30s|ISO 160
Image 02. Exposure: Aperture F8|Shutter Speed 1/4s|ISO 800
Image 03. Exposure: Aperture F8|Shutter Speed 1/5s|ISO 400
I hardly make any B&W image, it is just not my thing.

To gain more knowledge about this genre, I did spend sometime finish reading few books about B&W photography, and learned some cool techniques but become forgetful as I hardly practice it that much. Few keys for good B&W photos are looking for/pre-visualize -

- Shape & Form
- Texture & Pattern
- Contrast
- Tonal Range

So why B&W this time? It comes down to the visit of Kandawgyi Lake at night. Today Kandawgyi Lake becomes famous leisure park and there are a lot of people visiting the lake, especially family and lovers, however the most interesting aspect of this lake to me is "you see a lot of hard light and strong shadow almost everywhere".

Thought process: Kandawgyi Lake seems to be a good playground for B&W photography, my friend has accompanied me to the lake since he want to see how I capture night photos. I spent sometime sharing my experience and showing some spontaneous light painting to my friend, after that I focused on hunting strong shape and shadow that reflect the objects I was capturing.

Post-processing wise, I'm gearing towards neo-noir style.

Friday 20 April 2012

MNS: Waiting For Nothing

Exposure: Aperture F8|Shutter Speed 10s|ISO 200
Shooting this is fun, most of Myanmar people never shy away from my camera, to be honest I don't know what are they waiting for, neither do they talk to each other as well.

Thought process: I compose carefully on this one, position the camera to include the path in the frame, white balance is set to sunlight to retain the sense of place because it is hot night. What I don't expect is the 3 musketeers at the other side stays still for like 10 seconds, as if they are really posing for me ;)

Thursday 19 April 2012

MNS: Water Truck For Living

Exposure: Aperture F9|Shutter Speed 25s|ISO 200
According the the locals, the truck is used to send water to rural area for daily usage, it really tells how life is tough in the country.

Thought process: Get the composition and exposure right, then wait for timer to finish, you can see the beautiful sky color here, most of the time I will use tungsten white balance at night but not for this one since I want to retain orangish sky color.

For the second image here, there's street light in the front of the car which illuminates the water flow pumping into the water tank of the truck. I have also filled the shadow with my torch light to recover the detail of the rear part and watering ground.

Wednesday 18 April 2012

MNS: Creative Lens Filter For The Night

Exposure: Aperture F5|Shutter Speed 1/4000s|ISO 1600
Exposure: Aperture F5|Shutter Speed 1/15s|ISO 1600
Back from work, we are on the road and the old car has scratchy glass.

Thought process: I see interesting pattern generated by this scratchy glass, make use of it as my filter to capture the image. No way for me to do long exposures in the car, maybe next time I should ask the driver if I can buy his glass.

Sunday 15 April 2012

MNS: Light Painting Experiment

Exposure: Aperture F8|Shutter Speed 34s|ISO 100

Exposure: Aperture F8|Shutter Speed 24s|ISO 100
History of this abandoned house is not known, I would like to know more but people over there don't really speak English language and I myself suck at speaking Myanmar language, most of the time body language is used to interact with people nearby the area. One thing I found interesting is most of the old houses in Yangon city are not straight up.

Thought process: I'm not really into composition for this one, however I'm trying to be more playful with the use of red and green light, including filling the shadow with the red light, and casting light(red) on the shadow that generated by the other light(green).

Saturday 14 April 2012

MNS: Enter the night

Exposure: Aperture F8| Shutter Speed 15s|ISO 100
This is busy area during day time, where people are busying with their daily activities. At night however, nothing much happening around, cars are parked on the road side, everyone goes back to rest and sleep.

Thought process: Standing in the middle of the road while doing long exposures since not many cars around and I should be able to avoid crashing, to create balance, make sure building at both side has equal amount of present in the frame, tilt the camera up a little so that the perspective will show how tall the buildings are.

Friday 13 April 2012

MNS: Rangoon War Cemetery 1939-1945

Exposure: Aperture F8|Shutter Speed 30s|ISO 400
For the history of the location, I can't explain better than this.

Thought process: I'm locked out of the gate, they don't allow visitors to enter after 7pm so I only have limited space to take the photograph of this war cemetery, to make it interesting, I illuminate the gate with my torch light to form the strong cross shadow and adjust it carefully to merge with the cross statue in order to lead the eyes to the main subject(cross statue). Red light is used here to remember the blood and tears of the casualties.

R.I.P.

Wednesday 28 March 2012

MNS: On The Road

Exposure: Aperture F8|Shutter Speed 20s|ISO 100
Coincident isn't it, the time I was in Myanmar, it was having couple of full moon nights, I took the opportunity to walk out from the hotel room, and went out for some night hunting. Surprisingly the road is very clean.

Thought process: Moonset period, and the road is not so busy in the late night, both left and right have traffic lights, so waited until I see many cars stopped by the red light, then click on the shutter when the traffic light goes green since I only have 20 seconds to capture the light trail.

What can I say? Clean road, and clean light trail!

Tuesday 27 March 2012

Myanmar Night Series

Exposure: Aperture F8|Shutter Speed 15s|ISO 200
I will be posting a series of night photos that I have made during Yangon, Myanmar trip, people may ask "Is it safe to go out alone at night in Yangon City?"

I don't have exact answer for you here, I went out during full moon nights, walking to different areas and making friends with the locals, then asked the permission before I take the photos, I just can't do ninja/sniper kind of shooting at night since I really want to take my time, and capture the night scenery in detail.

Thought process: This is the view from my hotel room, and the infamous Shwedagon Pagoda at the far end channels its light to illuminate the sky. Working with the limited space in the room, I tilted down my camera a little to include the frontal building blocks to create mode depth for the image.

More to come for Myanmar night series.

Friday 23 March 2012

The Night Shape

Exposure: Aperture F3.5|Shutter Speed 1/4s|ISO 1600

At night where there's not much light, we recognize our surrounding by shape, this is not perfect image to speak, but it does show how shape helps us to recognize things.

Thought process: I don't have second thought on this, the cat was sitting on top of the wall, and I quickly used my torch to illuminate the cat from the left to form strong shadow, another hand picked up the camera and click, the cat moved around quickly after that. I don't get the correct exposure here but it does deliver what I have in my thought.

By the way my friend said it is a giant snail, I can only wish if the snail has tail if he is right ;)

Thursday 15 March 2012

Fishing Village: Loading Stage

Exposure: Aperture F11|Shutter Speed 30s|ISO 200
Another take of the same fishing village, I seemed to be making a come back to the same location for night photography these days, the revisiting always refreshes me to look at the same location in different perspective, in a new way.

Thought process: Shooting wide, with careful composition to cover both left and right end to complete the line in the frame. For the light painting part, I used green light to illuminate the fish boat loading stage on the left. and then cast warm white light to illuminate the whole scene from camera right at ground level.

Oh yeah, the cat is with me again ;)

Saturday 3 March 2012

Night Photography: Location Scouting

It has been raining at night since last week, so I choose to do location scouting in the morning. Normally I just look for location around me because I want to visit the same location frequently, otherwise it takes a lot of time to make long trip to somewhere far for night photography. My location scouting is simple, basically I just drive without destination, to look for endless opportunities out there and this time I'm rewarded with few locations for the night out.

First location is a scrapyard, I have actually noticed about this scrapyard before but never meet the owner, sometimes to shoot the location without concern, all we need to do is socializing, lucky enough I get to talk to the owner and I'm welcome to shoot the scrapyard anytime in future, thank you.

Scrapyard
Scrapyard
Second location is rock mountains, I need to shoot this location soonest as some of the rock mountains have been destroyed and housing development is in progress. The landscape will change soon.

Rock Mountain
Third location consists of few trees, but they all look like growing some hair, shooting them at night will be interesting.
Hairy Trees
Forth location is forest mountain, I don't think this location will be preserved for long as well since some rough paths have been built up here.

Forest Mountain
With more locations available, I need to arrange my time properly for night photography, foresee myself to revisit them at night especially the scrapyard.

Monday 27 February 2012

Night Watcher

Exposure: Aperture F16|Shutter Speed 15s|ISO 200
Who is watching your back at night?

Thought process: Moonset period, waiting for it to get into the black box(it's a truck actually) so that I can frame it exactly match to what I have in mind, and finally when the timing is right, light painting at the back of this black box from the bottom up to create more dimensional image.

Saturday 25 February 2012

Machine Addict

Exposure: Aperture F8|Shutter Speed 30s|ISO 100
I'm always obsessed with machines/robotics, not too sure if it is side effect of watching too much sci-fi movies during my childhood.

Thought process: To create depth in the image, angle, relative size, distance, contrast and shadow are all important factors. This image is taken during full moon, together with lighting painting using Quark RGB flashlight on camera left.                                                 

Thursday 23 February 2012

Full Moonset: Subtlety

Exposure: Aperture F16|Shutter Speed 8s|ISO 100
Full moon is always the favorite time for night photographer because the moon will be the best light source out there. The moon will rise in the east and set in the west so we can basically track the moon trail. The coming full moon(March 7th) will be decent time to go out for night photography as there's possibility to see moonset at horizon before sunrise.

Thought process: It's all about subtle reflection for me in this image, the moon will set at 9am morning so there's no way to see it at horizon, I have low tide here with the mud land(no sea water here otherwise you will see silky and smooth surface in long exposures), the moon light illuminated the mud land, and it was actually reflected in the only small pool of water in this mud land. We all love to have depth in the image by taking interesting subject in the foreground, and I really have subtle one this time.